Self-Sufficient U Blog
Contact
Clark County Extension Service
Amy Simpson, Horticulture
Cindy Ham, 4-H and Ag
JoAnn Vann, Family & Consumer Sciences
Phone: 870-246-2281
Email: clark-arkadelphia@uada.edu
Follow us on
Facebook
Clark County
Cooperative Extension Service
640 S 6th Street Suite B
Arkadelphia, AR 71923
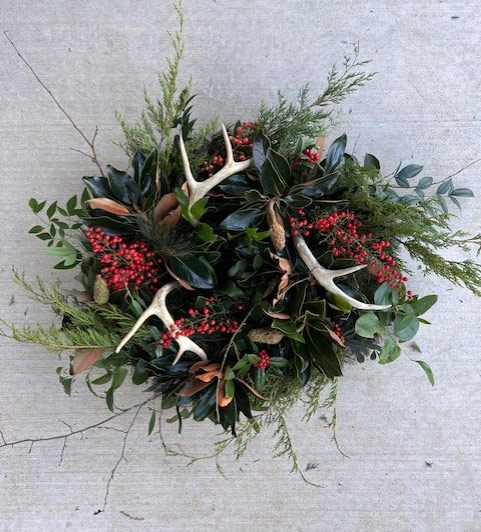
Simple & Stunning: Create a Foraged Holiday Wreath
By Amy Simpson, County Extension Agent – Staff Chair, Clark County
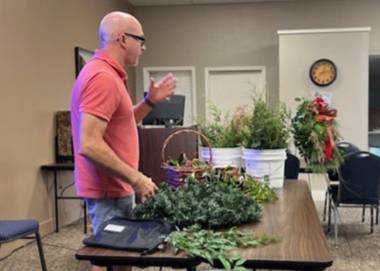
I recently hosted a Lunch and Learn class on making your own holiday wreath using items that can be foraged from your landscape or out in the wild. I asked David Goodman of Mary and Martha’s Florist and Gifts here in downtown Arkadelphia to teach the class, and he was gracious enough to do so.
I wanted to share how he taught us to take a cheap, basic, wired wreath and elevate it to high end décor with bits and pieces of plants you can find easily (and for free).
Gather Your Supplies
Start by gathering the items you will need to create the wreath. You will need:
- A wreath with the wired “evergreen” tips
- Your foraged cuttings
- Any embellishments you may want to add
The great thing about this method is that you don’t even need wire because you will be using the wired tips of the wreath to secure your cuttings.
What to Forage
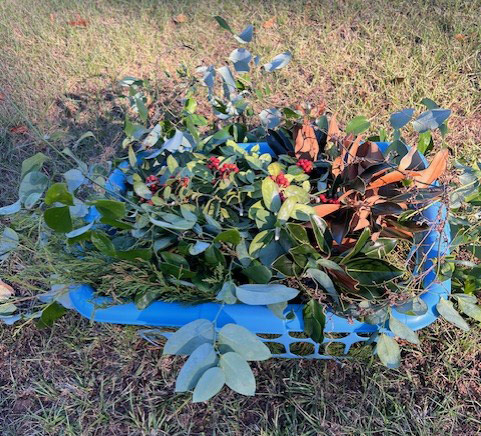 There’s no limit to what you can use to create your wreath. Use what you have available
and what looks interesting to you.
You may have a few plants around your lawn that will make good cuttings, and your neighbor may have other plants that can be used. See if you can trade with each other to make your wreaths more diverse and interesting.
Some suggested easy-to-find plants to forage from are:
- Pine limbs and cones
- Cedar
- Holly limbs and berries
- Magnolia
- Nandina limbs and berries
- Boxwood
- Southern smilax (a common vine in the wild)
- Bare branches
- Dried seed head and pods.
I take a laundry basket, some gloves, and pruning shears with me on my foraging. Try to get at least 5-8 cuttings of each plant you are using. How full your wreath turns out will depend on how many different plants you use and how many cuttings you take from each one.
Creating the Wreath
There’s no wrong way to make you wreath. Do what looks good to you!
These are the steps David took in creating his wreath during our class:
- If you want to include lights, do this first. Use lights with a battery pack and secure
the lights throughout the wreath by twisting two of the wired tips of the wreath around
the wire in various places. Make sure the battery pack is easily accessible.
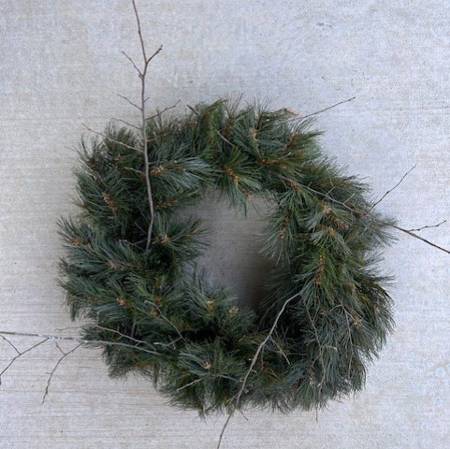 Bare branches can add a nice “structure” to the wreath. Place these around the wreath
at an angle, so they aren’t radiating directly out from the wreath.
Again, twist two of the wired tips of the wreath to secure each branch.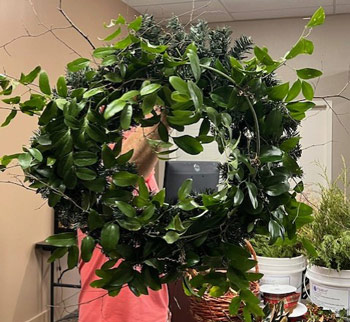 David then added pieces of what he calls “the perfect greenery” – southern smilax – because it hangs great, is flexible, and lasts a long time.
The best part about this is that it commonly grows on tree lines and overgrown areas.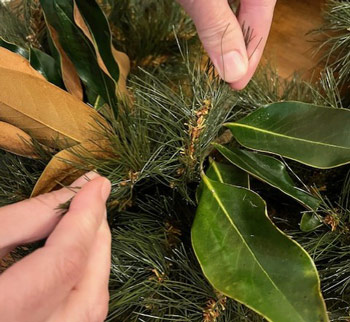 Small magnolia cuttings that included the cones were twisted in next. The magnolia
cuttings we used were from a “Little Gem” magnolia and the undersides of the leaves
were a nice velvety golden-brown. Magnolia leaves also look great if spray painted
gold or silver if you want to add a little glam to your wreath.
Small magnolia cuttings that included the cones were twisted in next. The magnolia
cuttings we used were from a “Little Gem” magnolia and the undersides of the leaves
were a nice velvety golden-brown. Magnolia leaves also look great if spray painted
gold or silver if you want to add a little glam to your wreath.- Nandina leaves added an “airy” element. The ones we used were from the old home-place type,
sometimes called heavenly bamboo. They were green, but if you have one of the other
nandina types that turn red and burgundy this type of year, those could be interesting
to use as well. The green nandina leaves weren’t really eye-catching, but they did
add another texture layer.
- Arkansas has Eastern red cedar growing along nearly every fence row. You may want
to make sure you have leather gloves on when cutting and adding it to the wreath because
its small needles can hurt your hands, but it does provide great texture and different
shade of green.
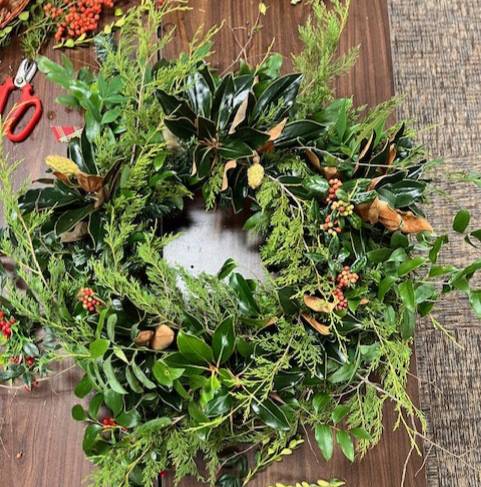 Berries from holly and nandina were added in next for a pop of red color. However,
both types of berries are poisonous to pets and humans, so you may choose to use artificial
berries to prevent any fallen berries being picked up and eaten by small children
or pets.
You could also add dried seed pods at this point as well.
- For the last step, David added a large bow as embellishment. You can skip the bow, or you can add other embellishments like Christmas balls, antlers, feathers, etc.
Final Tips
A few important things to keep in mind when foraging and making your wreath:
- Don’t forage on someone else’s property without permission.
- Making a foraged wreath is messy. I highly recommend doing this outdoors. I made mine on my front porch and was still surprised at what a mess I had made.
- Foraged wreaths will dry out in a couple of weeks, so you will need to either replace your cuttings then or just wait till a few weeks or days before having your holiday gatherings to make them.
- The same method could be used to create gorgeous garlands, using the inexpensive, plain green wired garlands.
It’s a fun way to get in the holiday spirit and get a little exercise while you’re out foraging. Use what you have at hand and try to mix textures and shades for a nice, full, high-end looking wreath.
Show us your DIY foraged wreath or garland!
If you do make a foraged wreath or garland, send a picture to our Self-Sufficient U – UADA Facebook Messenger. We’d love to see your creativity!