Self-Sufficient U Blog
Contact
Clark County Extension Service
Amy Simpson, Horticulture
Cindy Ham, 4-H and Ag
JoAnn Vann, Family & Consumer Sciences
Phone: 870-246-2281
Email: clark-arkadelphia@uada.edu
Follow us on
Facebook
Clark County
Cooperative Extension Service
640 S 6th Street Suite B
Arkadelphia, AR 71923
Is my yeast still good?
by JoAnn Vann
 Tonight, I will baking some bread with my first batch of home ground wheat flour from
hard white wheat berries. I am already imagining the nutty fragrance of whole grain
bread wafting from my oven, but I have a problem of sorts. Is my yeast still good?
Tonight, I will baking some bread with my first batch of home ground wheat flour from
hard white wheat berries. I am already imagining the nutty fragrance of whole grain
bread wafting from my oven, but I have a problem of sorts. Is my yeast still good?
Yeasts are living microorganisms used to make baked goods rise (leaven). To remain viable as a leavening agent, they must be stored away from high heat and moisture. Depending on the manufacturer, the type of package, and type of yeast (instant dry, quick acting, or bread machine) the best by date could vary widely.
Placing yeasts packages in the refrigerator or freezer are a common practice for extending their shelf life. For more details on longer storage life, check out this resource from Utah State Extension Cooking Food Storage | USU.
Now that you know a little more about yeast, back to my problem. I absolutely do not want to waste my home ground wheat flour making dough that doesn’t rise, but I do not want to throw away my “special” yeast supply either.
Back in 2015, my Granny and I got big into baking together. For my birthday that year, she gave me a 1-pound brick of Red Star yeast. We used about half of it before she passed away later that year and it has been in an air tight container in the refrigerator ever since! I seem to catch the baking bug about this time each year because there is nothing like fresh bread with a bowl of creamy potato or vegetable soup.
Every year without fail, I look at the container of yeast and wonder, “Will this be the year that it doesn’t work?”
Luckily, there is an easy way to test yeast viability.
According to Utah State Extension, “To test dried yeast activity, add 1 teaspoon sugar to 1/4 cup warm water (~100°F). Stir in 1 envelope yeast (2 ¼ tsp.) and let stand 10 minutes. If the yeast foams to the 1/2 cup mark, it is active.” You do not have to discard the test batch, simply reduce the amount of liquid called for in the recipe by the ¼ cup used in the test. Add the test batch with liquid to your recipe.
So how did the yeast test turn out?
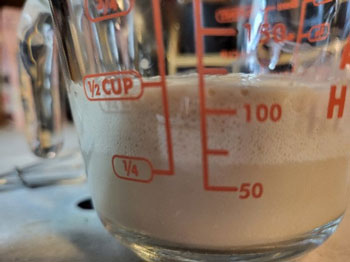
At 7 minutes of the 10 minute test the mixture had already reached the target mark of ½ cup.
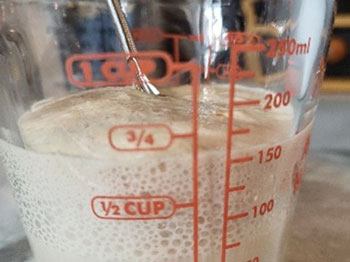
While I was preparing my remaining ingredients at the 13-minute mark, I noticed that it had expanded almost to the ¾ cup mark!
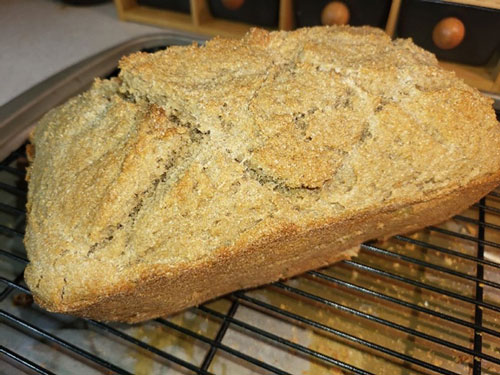
Now that I was confident that my yeast was active, I proceeded with my recipe for a no-knead whole wheat bread using my home ground wheat flour. The result was a lovely loaf of golden-brown bread perfect for slicing for sandwiches or toasting to serve with supper!
Interested in learning more about baking yeast breads?
Contact me at the Clark County Extension Office at 640 South 6th Street, Suite B in Arkadelphia, call 870-246-2281, or email at clark-arkadelphia@uada.edu for a free copy of a guide to baking yeast breads with recipes.